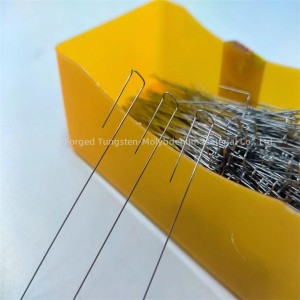
Quality Inspection for Jt Hotsale Tzm Molybdenum Rod/bar
We now have many fantastic staff members customers superior at advertising, QC, and working with varieties of troublesome problem within the generation system for Quality Inspection for Jt Hotsale Tzm Molybdenum Rod/bar, We never stop improving our technique and quality to keep up with the development trend of this industry and meet your satisfaction well. If you are interested in our products, please contact us freely.
We now have many fantastic staff members customers superior at advertising, QC, and working with varieties of troublesome problem within the generation system for Tzm Molybdenum, Tzm Molybdenum Rod, Tzm Rod, Our organization. Situated inside the national civilized cities, the visitors is very easy, unique geographical and economic situations. We pursue a “people-oriented, meticulous manufacturing, brainstorm, construct brilliant” organization. hilosophy. Strict top quality management, fantastic service, reasonable cost in Myanmar is our stand on the premise of competition. If vital, welcome to make contact with us by our web page or telephone consultation, we’re planning to be pleased to serve you.
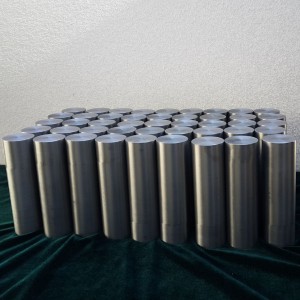
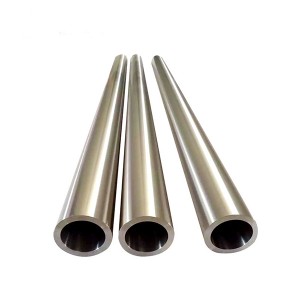
TZM rods
Chemical composition:
| Main and minor components | Min.content(%) | ASTM B386 (361) |
| Mo | blance | balance |
| Ti | 0.40-0.55% | 0.40-0.55% |
| Zr | 0.06-0.12% | 0.06-0.12% |
| Impurities | Max.values (μg/g) | Max.values (μg/g) |
| Al | 10 | - |
| Cu | 20 | - |
| Cr | 20 | - |
| Fe | 20 | 100 |
| K | 20 | - |
| Ni | 10 | 50 |
| Si | 20 | 50 |
| W | 300 | - |
| C | 100-400 | 100-400 |
| H | 10 | - |
| N | 10 | 20 |
| O | 500 | 300 |
| Cd | 5 | - |
| Hg | 1 | - |
| Pb | 5 | - |
Dimensions and tolerances:
| Diameter (mm) | Diameter tolerance (mm) |
| Ground | |
| 0.50-0.99 | ±0.007 |
| 1.00-1.99 | ±0.010 |
| 1.00-2.99 | ±0.015 |
| 3.00-15.9 | ±0.020 |
| 16.0-24.9 | ±0.030 |
| 25.0-34.9 | ±0.050 |
| 35.0-3939 | ±0.060 |
| ≥40.0 | ±0.20 |
| Cleaned | |
| 0.50-4.0 | ±2.0% |
| 4.10-10.0 | ±1.5% |
| 15.0-50.0 | ±0.30 |
| 51.0-75.0 | ±0.40 |
| 75.1-120.0 | ±1.00 |
| 121.0-165.0 | ±1.50 |
| Turned | |
| 40.0-49.9 | ±0.30 |
| 50.0-165.0 | ±0.40 |
Length and straightness:
| Diameter (mm) | Production length (mm) | Stiraightness/Meter (mm) | |
| Cleaned | Ground/turned | ||
| 0.50-0.99 | >500 | <2.5 | <2.5 |
| 1.00-9.90 | >300 | <2.0 | <1.5 |
| 10.0-165.0 | >100 | <1.5 | <1.0 |
Length tolerance:
| Diameter 0.50-30.0 mm | ||||||
| Nominal length (mm) | 6-30 | 30-120 | 120-400 | 400-1000 | 1000-2000 | >2000 |
| Length tolerance(mm) | ±0.2 | ±0.3 | ±0.5 | ±0.8 | ±1.2 | ±2.0 |
| Diameter >30.0 mm | ||||||
| Nominal length (mm) | 6-30 | 30-120 | 120-400 | 400-1000 | 1000-2000 | >2000 |
| Length tolerance(mm) | ±1.0 | ±1.5 | ±2.5 | ±4.0 | ±6.0 | ±8.0 |
Density:
1. 0.50-40.0 mm ≥10.15g/cm³
2. 40.1-80.0 mm ≥10.10g/cm³
3. 80.1-120.0 mm ≥10.00g/cm³
4. 120.1-165.0 mm ≥9.90g/cm³
Nondestructive testing: For diameters>15.00 mm:100% ultrasonic testing; For diameters of 0.50-50.0mm:Eddy curent tests on rods with ground.
| Diameter(mm) | Tensile strength(MPa) | 0.2% Yield Strength(MPa) | Elongation(%) | Hardness(HV 10) |
| 0.50-4.76 | - | - | - | - |
| 4.76-22.20 | ≥790 | ≥690 | ≥18 | |
| 22.20-28.60 | ≥760 | ≥655 | ≥15 | 260-320 |
| 28.60-47.60 | ≥690 | ≥585 | ≥10 | 250-310 |
| 47.60-73.00 | ≥620 | ≥550 | ≥10 | 245-300 |
| 73.00-120.9 | ≥585 | ≥515 | ≥5 | 240-290 |
| 121.0-165 | ≥585 | ≥515 | ≥5 | 220-280 |
Surface condition:
| Surface: | Cleaned | Ground | Turned |
| φ0.50-165mm | φ0.50-50.00mm | φ≥40.00mm | |
| Roughness | Diameter (mm) | Ra (μm) Ground | Ra (μm) Turned |
| ≤2.50 | ≤0.80 | - | |
| 2.5-50.0 | ≤1.00 | - | |
| ≥40.0 | - | ≤3.2 |


